Valentine’s Day is a time for sharing love and creativity, and what better way to celebrate than with a Minecraft-themed Valentine box? Combining the pixelated charm of Minecraft with the festive spirit of Valentine’s Day, this project is perfect for gamers, crafters, and kids alike. Whether you’re making it for a classroom exchange, a special gift, or simply as a fun craft, here’s a comprehensive guide to creating your own minecraft valentine box.
Materials Needed
To get started, gather the following materials:
– Cardboard Box: A medium-sized box works best, but you can adjust based on your needs.
– Construction Paper: Green, brown, black, and red are essential. Additional colors can be used for accents.
– Scissors and Craft Knife: For cutting shapes and creating the card slot.
– Glue or Double-Sided Tape: To adhere the paper to the box.
– Markers or Paint: For adding details and personal touches.
– Minecraft Printables: Optional, for added ease and authenticity.
Step-by-Step Instructions
1. Prepare the Box
– Choose a box size that fits your needs. A shoebox or a small shipping box is ideal.
– Cut a rectangular slot in the top of the box for inserting Valentines. Ensure the slot is wide enough to accommodate cards but not too large.
2. Cover the Box
– Cover the entire box with green construction paper. This will serve as the base color, reminiscent of the iconic Minecraft grass blocks.
– Measure and cut the paper to fit each side of the box. Glue or tape the paper securely to the box.
3. Create the Pixelated Grass and Dirt Layers
– Cut small squares (about 1 inch by 1 inch) from green, brown, and black construction paper. These will form the pixelated look of the Minecraft blocks.
– Starting at the bottom, glue brown squares to represent the dirt layer. Work your way up, transitioning to black for the darker soil layer, and finally green for the grass on top.
– Arrange the squares in a staggered, mosaic pattern to mimic the pixelated design of Minecraft blocks.
4. Add Decorative Elements
– Use red construction paper to cut out hearts and other Valentine’s Day shapes. You can also use printables or stickers for this step.
– Glue the hearts and other decorations onto the box, adding a festive touch to your Minecraft theme.
5. Personalize Your Box
– Add your name or a fun Minecraft-related message using markers or paint. Consider phrases like “You’re a Gem!” or “Be Mine, Crafter!”
– Draw or attach small Minecraft characters, tools, or items to give your box more personality and detail.
Creative Variations
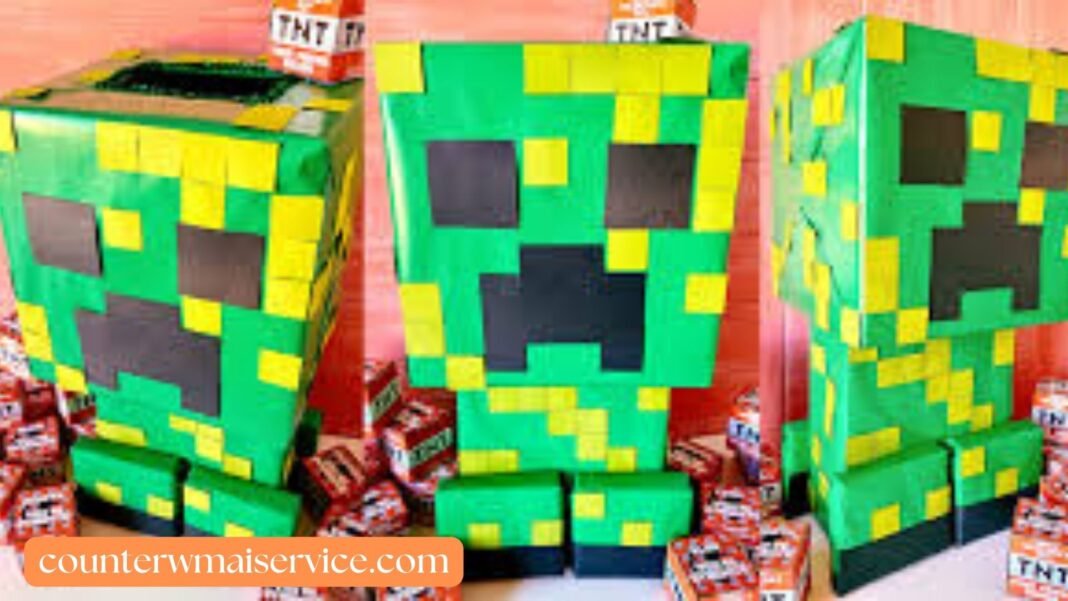
– Creeper Valentine Box: Use green and black paper to create a Creeper face on the front of the box. This variation adds a fun and recognizable Minecraft character to your Valentine’s Day celebration.
– Minecraft Chest: Decorate the box to resemble a Minecraft chest, complete with a latch and woodgrain patterns. This option is great for a more subtle yet themed Valentine box.
– Enderman Box: Use black construction paper to cover the box and add purple squares for the eyes. This sleek design is perfect for fans of the Enderman.
Conclusion
Creating a Minecraft Valentine box is a fun and engaging way to combine your love for the game with the festive spirit of Valentine’s Day. This project allows for endless creativity, whether you stick to classic designs or add your unique twists. So gather your materials, unleash your inner crafter, and get ready to impress your friends and classmates with a Minecraft Valentine box that’s as thoughtful as it is cool.


